Write an Article
How To Resize Multiple Images In Photoshop
If you have lot of images for resizing and you have to resize in Photoshop and you are fearing to think that how much time it will take to resize, so you should know about 2 functions of Photoshop that can help to resize all images in minutes, whose name is Batch and Actions, but first you’ll have to resize only an image and you’ll have to move all images in one folder. You will need one more folder for saving all of these images after resizing then you will be able to resize multiple images. These two functions will give you more ideas to do another work in Photoshop. Now if you want to resize, just follow these simple steps.
1. Open the image: First open an image to set up for resizing. For instance you can see in the above image, as if I have opened an image in Photoshop, whose dimension is 1600x977.
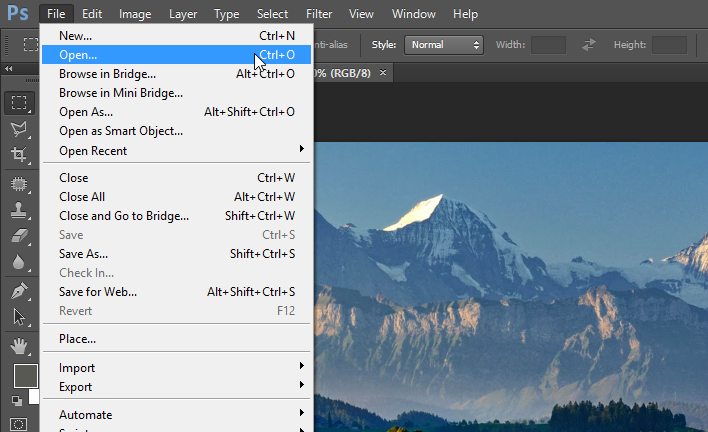
- First Open the Photoshop
- Go to the option of “File” at beside logo of Photoshop.
- See second option of “Open”, Click on it to open then find out that file, which is your first resizing file.
- Or you can also use shortcut “CTRL + O” to open file.
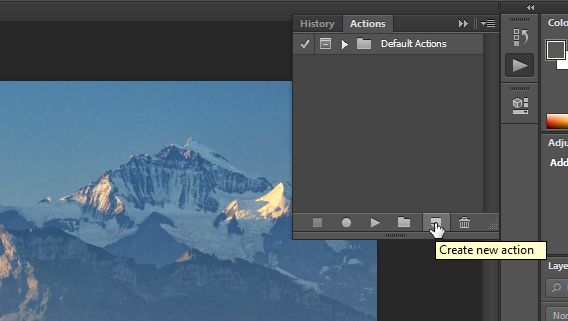
2. Create new action: Go to panel of “Actions” and then click on “Create new action”, which is at the bottom of actions panel, beside the trash can, New Action window will appeared. You can also open with the shortcut key of “ALT + F9”.
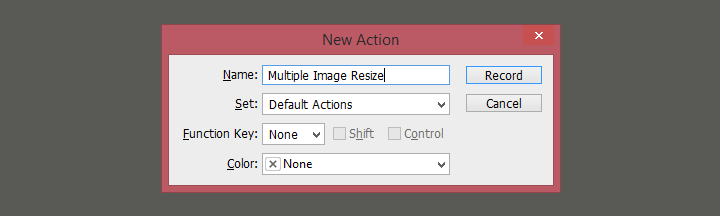
3. Name of action: After appearing new action window, you’ll need to give a pretty name of action that will record your every editing of image on that name and other options, needn’t to change, you can leave default as if can see in the image I left to change another options but I gave a name of “Multiple Image Resize” and click “Ok” and then go back to action panel to check action has created or not. If Action created, so you need to check the red record button is active or not, which is between play and stop button at bottom of action panel.
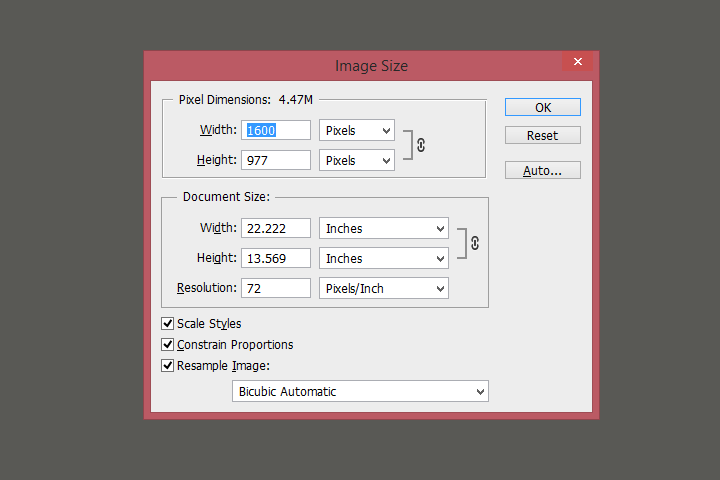
4. Resize the image: Now, you’ve to change the size of image. Go to option of “Image Size...” under the “Image” then you’ll see the window of Image size then change the size width and height and then click “OK”. Here is the shortcut “CTRL + ALT + I” of “Image size”.
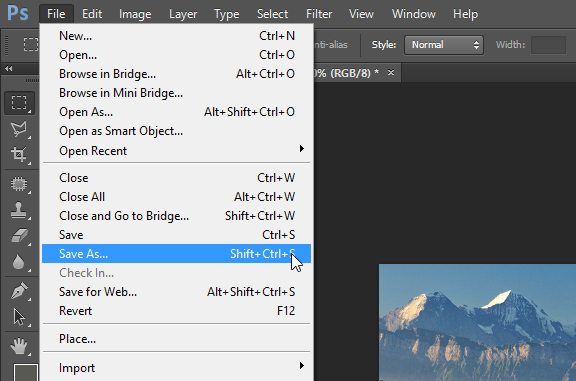
5. Save the image: You’ll need to save the file. Go to option of “Save As” under the “File” or you can also use shortcut of keyword “SHIFT + CTRL + S” then it will ask you that where do you want to save? So you’ll have to choose particular “resized folder”.
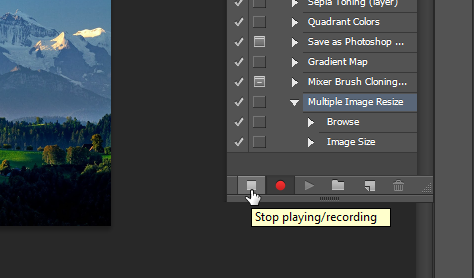
6. Stop Recording: Go back again to action panel then click on “stop” button at the bottom of action panel beside of red record button.
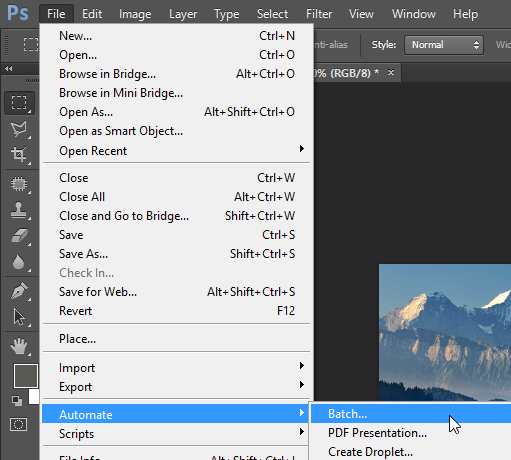
7. Go to “File” then option of [***“Batch…”***] under the “Automate” then click on “Batch”, Batch window will automatically be appeared.
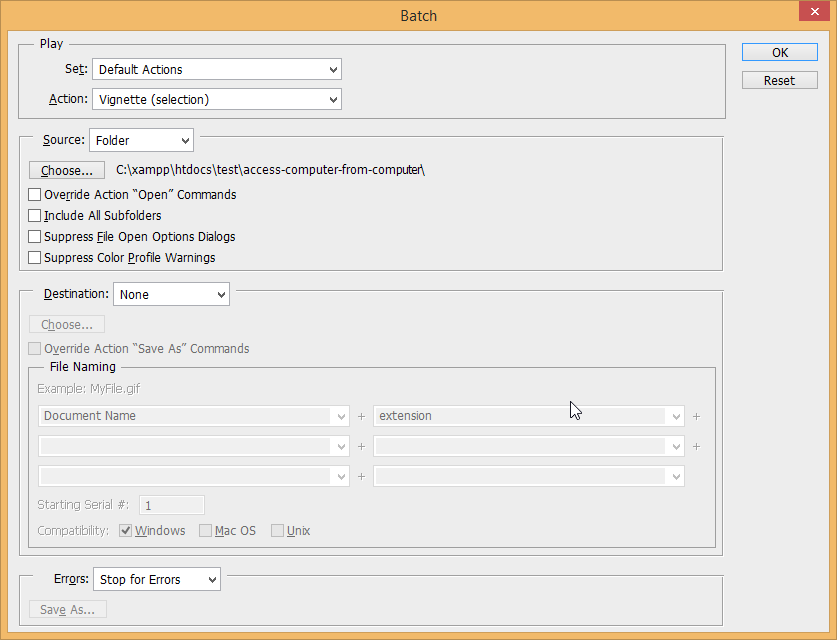
8. Resize all images: You’ll see an option of “choose” click on it to pick that folder of your resizing images are in. Keep all of these point in your mind.
- Do first with only one image lest all of your images will be spoilt.
- You needn’t to give any destination of file because you have already given.
- Whatever you will do into your action that all of things it will do in your every action so you should do carefully every steps into action.
Now, click on “Ok” to take out all images with new dimension. After clicking “Ok”, you will get all of your file in your destination folder, where you saved into the action.