Write an Article
How To Remove Acnes From The Face In Photoshop
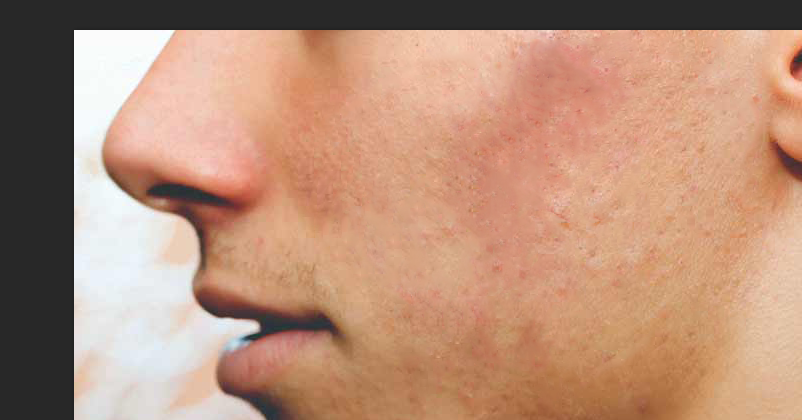
Do you not want to capture or save your images any more? Because your face look ugly to cause of acne. Don’t worry about it because you can remove acnes, pimples and all type of scars with the help of Photoshop. There are many ways to remove acnes but will teach you the easiest way to remove acnes from the face so that you look handsome as well as share freely all images anywhere.
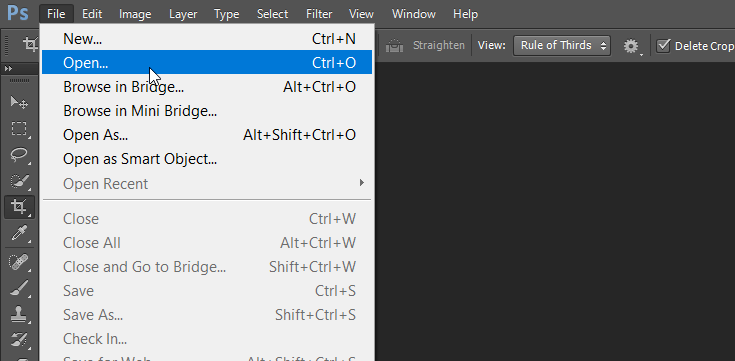
1. Open an image in Photoshop: First you’ll have to open Photoshop then click on the option of “open” under the “File” in the menu penal. If you want to import image from camera or other device that you use so you can also import to click on the “Import” under the “File”.
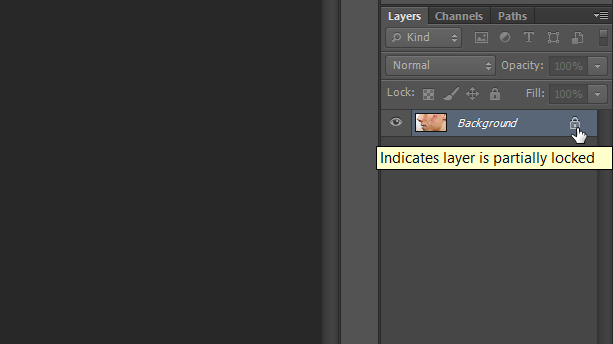
2. Lock to unlock image layer: here you need to just double click on the lock logo of image layer then your image will be unlocked.
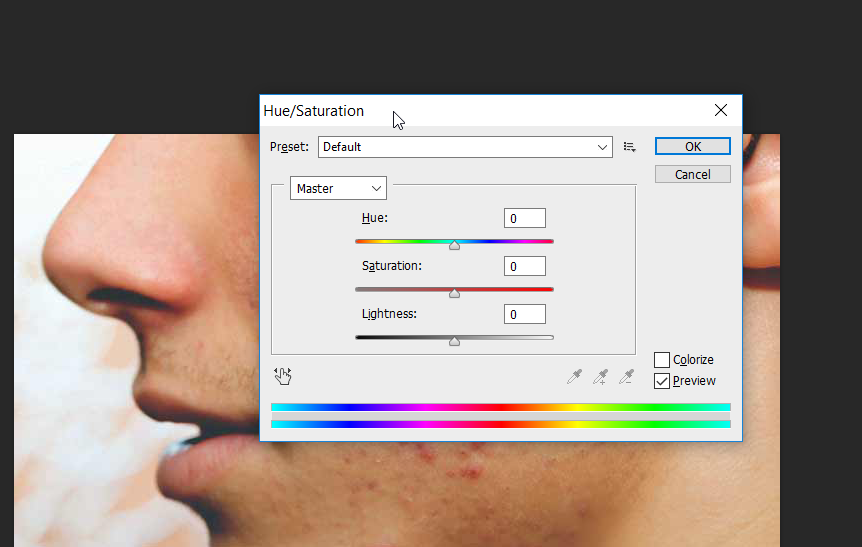
3. Do acnes color of darkest: It will remove acnes or pimples smartly after change the color of pimples or acnes, use the tool “Hue/Saturation” to dark the acnes. If don’t know then go to the “Adjustment Panel” that is your right hand side below the Color and Swatches tool panel but first need to select the layer of image then Hue/Saturation tool work, otherwise It won’t work. Change only saturation as much as look darkest and don’t change anything like Hue and Lightness.
- You can also open Hue/Saturation tool from the help of shortcut key “CTRL+U”.
- Open manually to go to “Image” at the menu penal then click on the “Hue/Saturation” under the option of “Adjustments”.
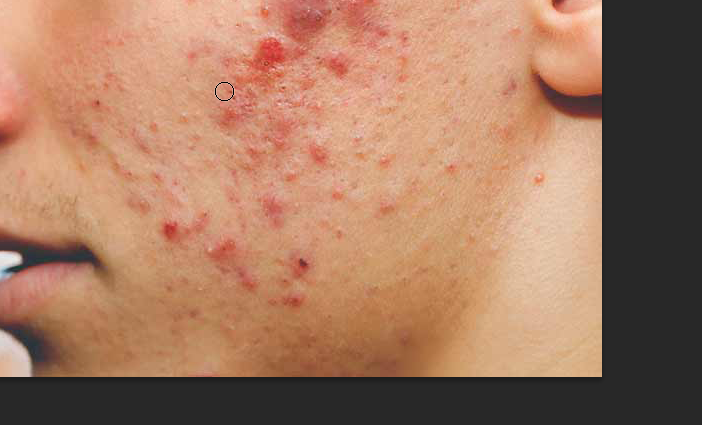
4. Remove all acnes from the face: Here is a very good tool “Spot Healing Brush Tool” to remove acnes, pimples and any type of scars quickly that will get in the “Tools”. If didn’t find then press the key “J”. Sport Healing Brush Tool will be selected and then start the brushing slowly on the acnes or pimples and don’t be so fast do slightly.
- When you are brushing on the acnes or pimples then it will drop the sign of brushing, therefore take the size as big as its sign of tool will not look awful.
- Check the mode of tool is set on Normal as well as Tool type is set on “Content-aware”.['li]
- Don’t overuse the tool at the same place, acnes or pimples.
5. Acnes has removed from the face: Now, You can see in this image that how image look after removing acnes.