Write an Article
How To Compress Large Audio And Video Files In Windows
Audio and video compressing is little bit difficult than compressing ordinary files. When you try to compress audio and video file from windows feature then it doesn’t compress well and converts your all video and audio files in zip format because videos and audios are chunks of data and downloaded from the internet audio and video is already compressed therefore doesn’t compress well but sometime it works for small files and if you have large file it doesn’t work. We have proper solution for it but you’ll have to take help third party tool that can compress. Even if file size too much, it will compress. If you want to compress large audio and video file then read this article.
Part 1. Compressing large audio files using third party tool
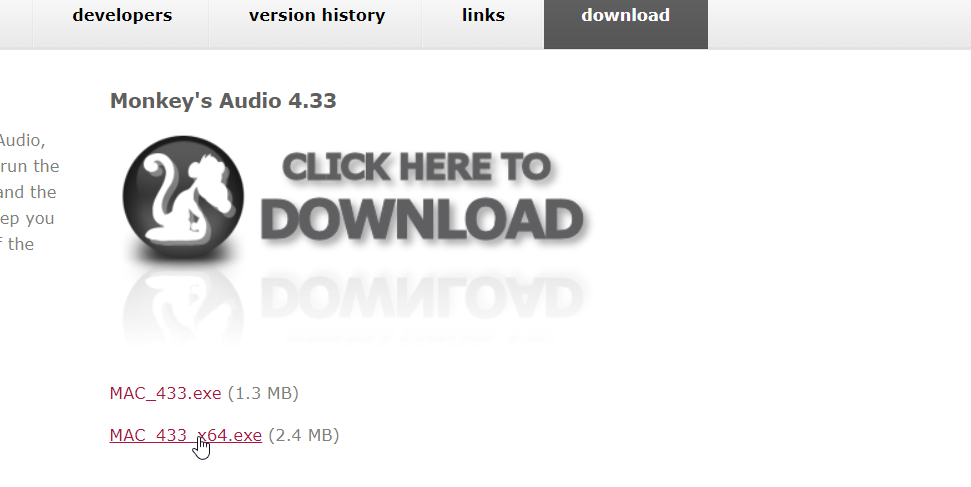
1. Download and install the tool that can compress your all large audio files: There are many types compression tools but every tool has own progress and some tools compress in less time and some takes more time to compress and it also depends on your file size. Monkey’s Audio tool that can compress fast only audio files and as far as I think it’s free and best tool for audio compressing. First you need to download this tool from monkeysaudio.com/download.html and then install.
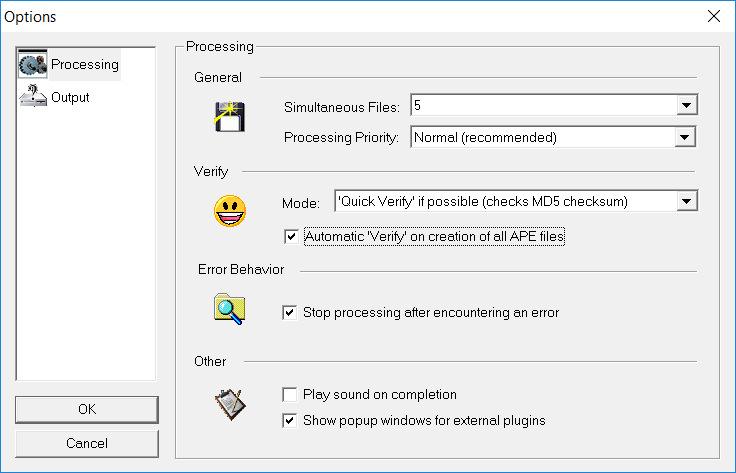
2. Need to change some process and output setting of tool: Now first open the tool after installing then go to the “options” under the option of tool, which is in menu penal at the top left corner of 2nd last corner and then change these settings carefully that is listed below.
- Change the value of simultaneous files 2 to 5 under General.
- Select the processing priority is on high.
- Check the box of “Automatic ‘verify’ on creation of all APE files”.
- Go to the setting of “Output” then ensure the option of “After Success:” that is not set on “Permanently delete source file” because if it’s set on then file will be automatically deleted after compressing so carefully change this option otherwise it could be harmful for your original audio file.
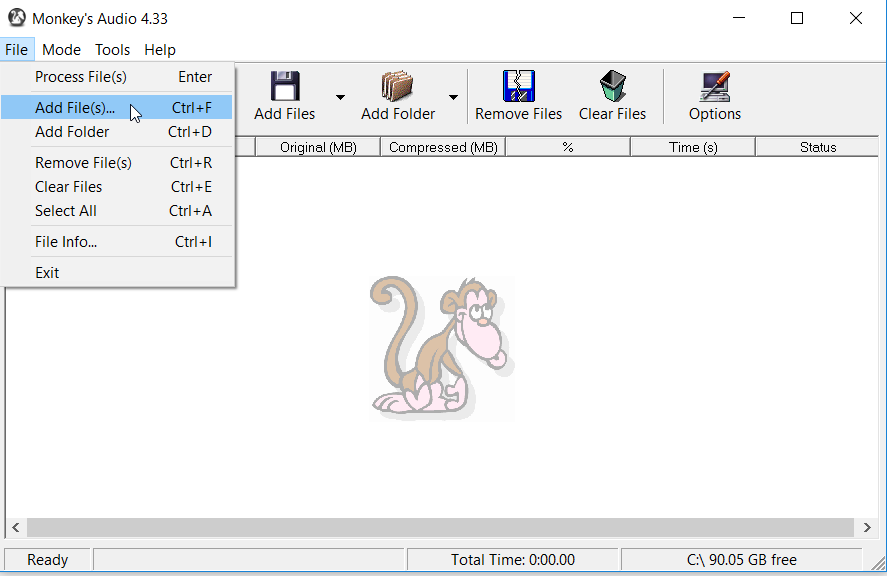
3. Add all audio files that you want to compress: It’s time to add audio files so now click on the option of “Add Files” then Select all your files that you want to compress then click on the button of “Open” and then your selected files will be appeared in the list.
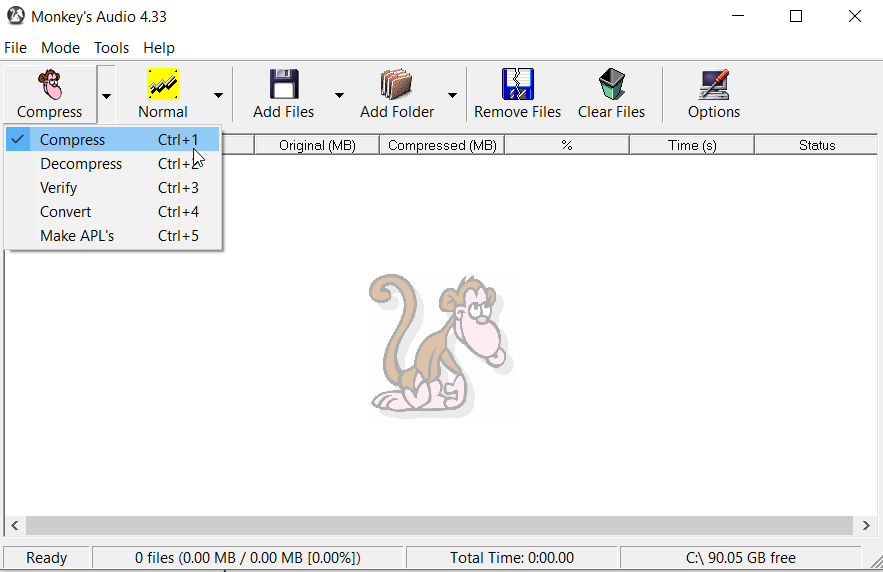
4. Start compression: After selecting files you need to just click on the button of “Compress” then compressing will be started and wait until your file is not successfully compressed and ensure carefully all the points that is listed below in bullets before compressing.
- Make sure the option of “Mode” beside “Tools”, is set on compress if it is set on other option then it will not compress.
- Check again the all settings that is mention in 2 step.
- If you have too large file then you need to free as much space as your file size.
Part 2. Compressing large video files using third party tool
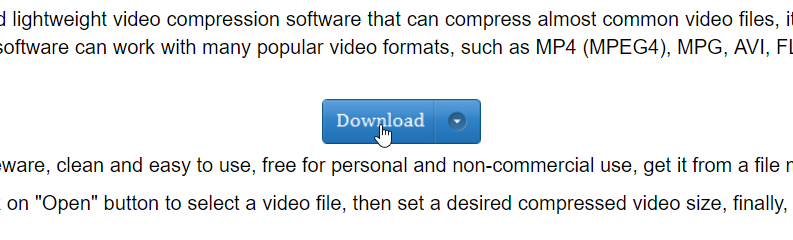
1. Download the Free Video Compression tool: It is completely free for personal and non-commercial without any water mark and it can almost compress all types of format and works efficiently and most important feature “Desired Video Size” that can set 10% to 100% of video size, its mean that can reduce more size of file with lossless quality so you need to install this tool for video compressing that can easily download from freevideocompressor.com.
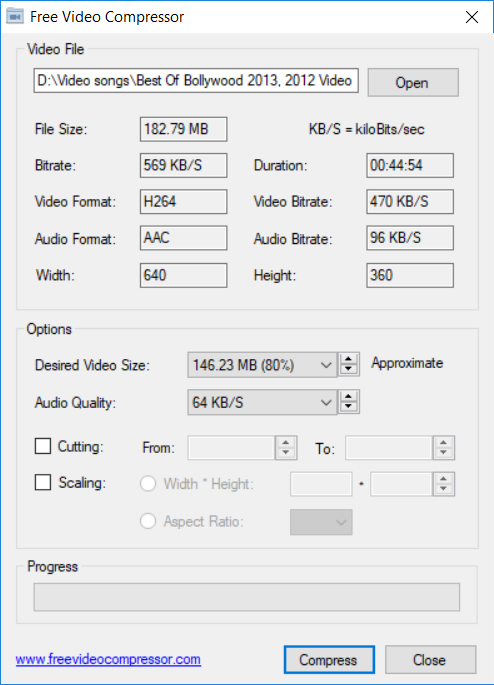
2. Make some changes for better compression: After download and installing this software, you’ll get the icon of this tool on your desktop, you can easily open this tool from desktop, now you need to open video file that you want to compress. After opening video file, you’ll get all information about the file such as File size, Bitrate, Video and audio format, width, height and video duration. You’ll have to change option according to video information so here are the default setting that you have to set.
- First you’ve to set the option of “Desired Video Size” is 50% as you can see in the image as well as audio quality is 128 KB/S.
- You’ve to set option of “scaling”. Here are the option of two types first is “width * height” and second is “Aspect ratio”, first option sets the custom size of video that you want and second option is aspect ratio that can set only 4 common type of video size. If you want to change aspect ratio then change accordingly original width of video, suppose your original video width is 720 if you change the width 720 to 1024 then your video won’t be compressed well so take this action carefully.
3. Start compression: Almost everything has done. You just need to click on “Compress” button to compress and then your compressed file is saved at the same location.